
Zion National Park Photography Guide: Capture the Canyon’s Light
With its sheer 2,000-foot sandstone monoliths, meandering rivers, and deep slot canyons, Zion National Park is a landscape photographer’s dream. Yet, the same high walls that make the park majestic also create challenging high-contrast lighting conditions. Capturing the perfect shot requires precise planning, knowledge of shuttle logistics, and understanding the behavior of light bouncing within the canyon. This guide provides detailed location breakdowns, coordinates, timing details, and composition strategies to help you bring home professional-grade gallery images.
1. The Watchman Sunset: Zion’s Iconic View
The image of The Watchman towering over the Virgin River is the defining photograph of Zion National Park. As the sun sets in the west, it casts a warm, orange-red glow directly onto the south-facing sandstone cliffs of The Watchman, while the Virgin River leads the viewer’s eye through the frame.
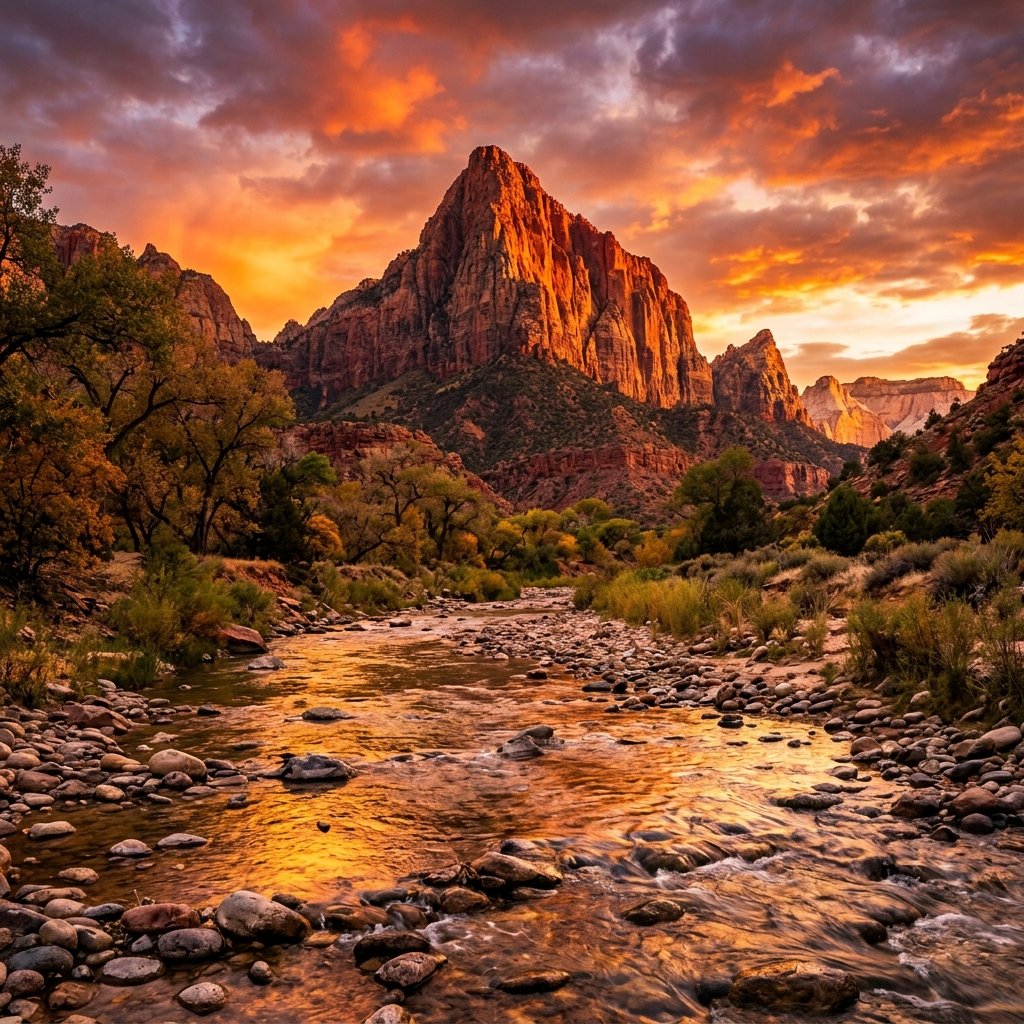
Location & Technical Guide
- Exact Location: Canyon Junction Bridge (where the Zion Canyon Scenic Drive meets Route 9). Coordinates:
37°13'03.6"N 112°58'32.4"W. - Shuttle Stop: Shuttle Stop 1 (Visitor Center) is a 15-minute walk, or Shuttle Stop 3 (Canyon Junction) during shuttle season.
- Best Time: Late afternoon to sunset. The peak glow occurs approximately 15 to 30 minutes before the official sunset time. Once the sun drops behind the western canyon wall, the light disappears rapidly.
- Focal Length: 24mm to 50mm on full-frame cameras. A slightly wider lens allows you to capture the sweep of the Virgin River in the foreground, while a 50mm compresses the Watchman slightly to emphasize its stature.
- Composition Tip: Use a sturdy tripod and a circular polarizer to cut glare on the wet river rocks and saturate the foliage. Frame the river utilizing the S-curve leading from the bottom-left toward the center of the frame.
Note: Due to crowds, the Canyon Junction Bridge can become extremely busy. Set up at least one hour before sunset to secure a position. Be respectful of traffic on Route 9, and never step into the vehicle lanes.
Want to find secret backcountry spots and master your camera settings under the guidance of a professional? Explore our curated local directory of verified, licensed photography guides and instructors operating in the Springdale and Zion area.
Browse Photography Guides »2. Angels Landing: Mid-Morning Depth & Scale
Angels Landing offers a dramatic aerial perspective of the canyon floor 1,500 feet below. The challenge here is the massive dynamic range between the shadowed canyon walls and the bright sky. The goal is to capture the depth of the valley and the winding path of the Virgin River.
Location & Technical Guide
- Exact Location: The summit of Angels Landing or Scout Lookout. Coordinates:
37°16'09.4"N 112°56'52.4"W. - Shuttle Stop: Shuttle Stop 6 (The Grotto), followed by a strenuous 2.4-mile hike. *Note: A permit is required to hike past Scout Lookout.*
- Best Time: Mid-morning (approximately 9:00 AM to 11:00 AM). During this window, the sun is high enough to illuminate the valley floor but low enough to cast dramatic shadows that outline the contours of the canyon walls. Early morning light is blocky and uneven, while noon light is flat and harsh.
- Focal Length: 16mm to 24mm wide-angle lens. A wide-angle is necessary to encapsulate both the soaring walls and the ribbon-like road on the canyon floor.
- Exposure settings: Shoot in RAW. Exposure bracket (-2, 0, +2 EV) to ensure you capture detail in both the bright white limestone on the canyon rim and the deep red sandstone shadows below.
3. The Narrows & The Subway: Capturing Glow Light
The slot canyons of Zion—such as the Virgin River Narrows and the Left Fork of North Creek (The Subway)—are famous for their “glow light.” This phenomenon occurs when direct sunlight hits the top of the canyon walls and reflects down into the shadows below, transforming the dark stone into a glowing canvas of gold, orange, and bronze. Directly lit areas should be avoided; you want to shoot entirely in the reflected shadow zones.
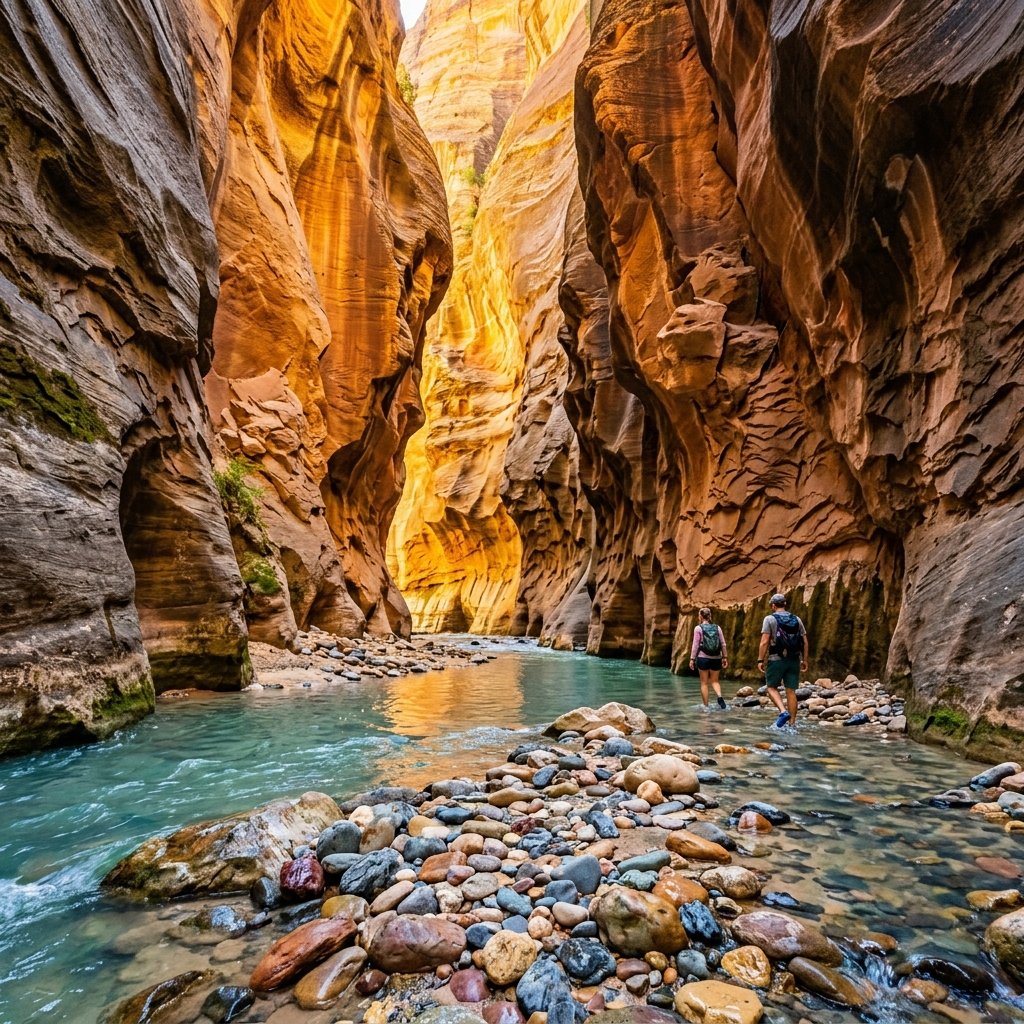
Location & Technical Guide
- Exact Location (The Narrows): Wall Street section. Coordinates:
37°18'22.1"N 112°56'50.2"W. Access via Shuttle Stop 9 (Temple of Sinawava) and hike 1.5 miles upstream. - Exact Location (The Subway): Left Fork trailhead (Kolob Terrace Road). *Note: A specialized wilderness permit is required.*
- Best Time: 10:30 AM to 2:30 PM. This is the only window when sunlight reaches the upper rim of the slot canyons, driving the intense orange bounce light down into the canyon floor.
- Focal Length: 16mm to 35mm. The walls are close together, requiring a wide perspective to frame the river and the soaring vertical slot architecture.
- Technical Setup: Polarizing filter is mandatory to remove reflections from the surface of the river, revealing submerged colored pebbles. Use a shutter speed between 0.5 and 2 seconds to create a silky water flow. Tripods are essential due to low light levels.
Safety Warning: Slot canyons are active flash flood zones. Never enter the Narrows or the Subway if rain is in the forecast anywhere in the surrounding drainage basin. Protect your gear in dry bags, and use dry pants and neoprene socks for wading.
4. Kolob Terrace & Kolob Canyons: Wilderness Sunset
For photographers wishing to escape the crowds of the main canyon, the western sections of the park—Kolob Terrace Road and Kolob Canyons—offer dramatic vista viewpoints and towering 2,000-foot finger canyons of crimson sandstone that face west, catching the last direct light of the day.
Location & Technical Guide
- Exact Location: Timber Creek Overlook (Kolob Canyons Road, exit 40 off I-15) or Lava Point (Kolob Terrace Road). Coordinates (Timber Creek):
37°27'42.1"N 113°11'27.9"W. - Access: Personal vehicle only. These areas are not serviced by the shuttle system.
- Best Time: Sunset. The finger canyons of Kolob face due west and act as giant reflectors for the sunset, glowing deep magenta and orange.
- Focal Length: 70mm to 200mm. A telephoto lens is highly effective here to zoom in on the textures of the massive cliffs and compress the distant peaks of the Pine Valley Mountains.
5. Zion at Night: Astrophotography & Star Trails
Zion National Park is a certified International Dark Sky Park. With minimal light pollution, the park offers outstanding opportunities to capture the Milky Way arching over sandstone monoliths like the Watchman, Checkerboard Mesa, or the Sentinel.
Location & Technical Guide
- Best Locations: South Campground bridge (facing south toward the Watchman), Big Bend (facing north toward the Organ), or Checkerboard Mesa.
- Best Time: Milky Way season runs from March to October. For the best detail, shoot during a New Moon or within a 4-day window on either side. The core is most visible looking south/southeast in the summer months.
- Lens: Wide-angle lens with a fast aperture (f/2.8 or faster, such as 14mm f/1.8 or 20mm f/1.8).
- Settings: Set your focus manually on a bright star using manual focus and screen magnification. Use the “500 Rule” (500 divided by your focal length) to determine the maximum exposure time before star trailing occurs (e.g., 500 / 20mm = 25 seconds). Set ISO to 3200 or 6400.
6. Camera Gear & Seasonal Timing
Different seasons bring different color palettes and photographic opportunities to Zion:
- Autumn (Late October to Mid-November): The peak season for Zion photography. Cottonwood trees in the canyon turn brilliant yellow and orange, creating a striking contrast against the red sandstone and blue skies. Temperatures are moderate, and water levels are low.
- Spring (April to May): The river runs high with snowmelt, filling the canyon with the sound of rushing water. Wildflowers begin to bloom, and weeping walls are active with springs. However, the Narrows is often closed during this time due to high CFS (cubic feet per second) river flow.
- Summer (June to September): Harsh noon sun. The best photography occurs during early morning or late evening. Monsoon season in late summer brings dramatic storm clouds, but also severe flash flood risks.
- Winter (December to February): Quiet season. Light snow caps the red sandstone peaks, creating stunning high-contrast graphic images. Main canyon road is sometimes open to private vehicles when the shuttle is inactive.
Recommended Packing List
- Filters: Circular Polarizer (mandatory for water reflections) and a 3-stop or 6-stop Neutral Density (ND) filter for long-exposure river flows.
- Tripod: A sturdy, carbon-fiber tripod that can withstand currents if you plan to shoot in the Virgin River.
- Protection: Lens cleaning cloths and a blower (red sandstone dust is highly abrasive). A dry bag is essential for slot canyon exploration.
Capturing Zion’s raw beauty requires patience, respect for the natural environment, and attention to light. By planning your hikes around the sun’s angle and understanding how light bounces through the red canyon walls, you can create images that convey the true spirit of this desert sanctuary.